I created a Markdown editor in React instead of a WYSIWYG editor.
Most of the source code is based on Introduction to React.
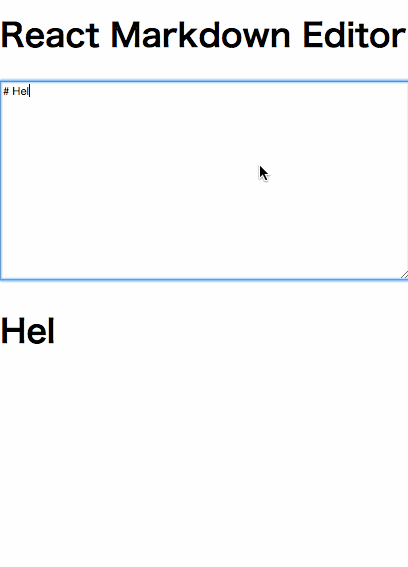
Here is a rough GIF sample (:3」∠)
Environment
- React
- marked (github) ... Markdown parser
- highlight.js (
highlightjs.org) ... Syntax highlighting - bower ... Used for managing all of the above packages
Preparation
Install marked and highlight.js using bower
bower install marked
bower install highlightjs
Please install them in your own environment and set the paths accordingly. Make sure to use highlightjs, not highlight. They are different, and I got stuck for about an hour because of this mistake... (cry)
Implementation
The HTML looks like this↓
index.html
<!DOCTYPE html>
<html>
<head>
<meta charset="UTF-8" />
<title>Hello React!</title>
<link href="//netdna.bootstrapcdn.com/font-awesome/4.0.3/css/font-awesome.css" rel="stylesheet">
<link href="path/to/monokai.css" rel="stylesheet">
<link href="path/to/style.css" rel="stylesheet">
</head>
    <body>

    <div class="markdown-component">

        <h1>React Markdown Editor</h1>

        <div id="content"></div>

    </div><!-- .component -->


    <!-- scripts -->
    <script src="path/to/react.js"></script>
    <script src="path/to/react-dom.js"></script>
    <script src="https://cdnjs.cloudflare.com/ajax/libs/babel-core/5.8.34/browser.min.js"></script>
    <script src="path/to/marked.min.js"></script>
    <script src="path/to/highlight.pack.min.js"></script>
    <script type="text/babel" src="path/to/markdown.js"></script>

    </body>
</html>
I like the Monokai color theme for syntax highlighting, so I set the Monokai stylesheet. For Babel, I am using a CDN this time, but you can also install it via bower.
Now, let's create the React components. As mentioned earlier, most of the code is based on Introduction to React, so I recommend reading it first.
I just added the configuration code for highlight.js to the reference source. (Not doing much work, lol)
markdown.js
var App = React.createClass({
    getInitialState: function() {
        return {
            markdown: ""
        };
    },

    updateMarkdown: function(markdown) {
        this.setState({
            markdown: markdown
        });
    },

    render: function() {
        return (
            <div>
                <TextInput onChange={this.updateMarkdown}/>
                <Markdown markdown={this.state.markdown}/>
            </div>
        );
    }
});

var TextInput = React.createClass({
    propTypes: {
        onChange: React.PropTypes.func.isRequired
    },

    _onChange: function(e) {
        this.props.onChange(e.target.value);
    },

    render: function() {
        return (
            <textarea onChange={this._onChange}></textarea>
        );
    }
});

var Markdown = React.createClass({
    componentDidUpdate: function() {
        marked.setOptions({
            highlight: function(code, lang) {
                return hljs.highlightAuto(code, [lang]).value;
            }
        });
    },

    propTypes: {
        markdown: React.PropTypes.string.isRequired
    },

    render: function() {
        var html = marked(this.props.markdown);

        return (
            <div dangerouslySetInnerHTML={{__html: html}}></div>
        );
    }
});

ReactDOM.render(
    <App />,
    document.getElementById("content")
);
The components are divided into three parts: the text input component, the Markdown output component, and the component that integrates them.
The parsing of Markdown is done using the marked function. In the componentDidUpdate section, I set the options to use highlight.js. You can find the method for setting options in the highlight.js README.
dangerouslySetInnerHTML is a property used to sanitize data for XSS prevention.
Thoughts
This is my first time creating an editor, and it’s amazing how quickly it can be done with libraries~ (:3」∠)
ES6 Version
Recently, I studied ES6, so I rewrote it. I wasn’t sure how to handle propTypes, so I omitted that part, lol.
/**
 *
 * Editor
 *
 */

import React from 'react';
import ReactDOM from 'react-dom';

export default class Editor extends React.Component{
  constructor(props) {
    super(props);

    this.state = {
      markdown: ''
    };

    this.updateMarkdown = this.updateMarkdown.bind(this);
  }

  updateMarkdown(markdown) {
    this.setState({
      markdown: markdown
    });
  }

  render() {
    return (
      <div>
        <TextInput onChange={this.updateMarkdown}/>
        <Markdown markdown={this.state.markdown}/>
      </div>
    );
  }
};

class TextInput extends React.Component{
  constructor(props) {
    super(props);

    this._onChange = this._onChange.bind(this);
  }

  _onChange(e) {
    this.props.onChange(e.target.value);
  }

  render() {
    return (
      <textarea onChange={this._onChange}></textarea>
    );
  }
};

class Markdown extends React.Component{
  constructor(props) {
    super(props);
  }

  componentDidUpdate() {
    marked.setOptions({
        highlight: function(code, lang) {
          return hljs.highlightAuto(code, [lang]).value;
        }
    });
  }

  render() {
    var html = marked(this.props.markdown);

    return (
      <div dangerouslySetInnerHTML={{__html: html}}></div>
    );
  }
};